Address
Malik Saleem Plaza, New City, Wah
Pakistan
WhatsApp: +92 327 510047
Email: info@developmech.com
Work Hours
Monday to Friday: 3PM - 11AM
Weekend: 10AM - 5PM
Address
Malik Saleem Plaza, New City, Wah
Pakistan
WhatsApp: +92 327 510047
Email: info@developmech.com
Work Hours
Monday to Friday: 3PM - 11AM
Weekend: 10AM - 5PM

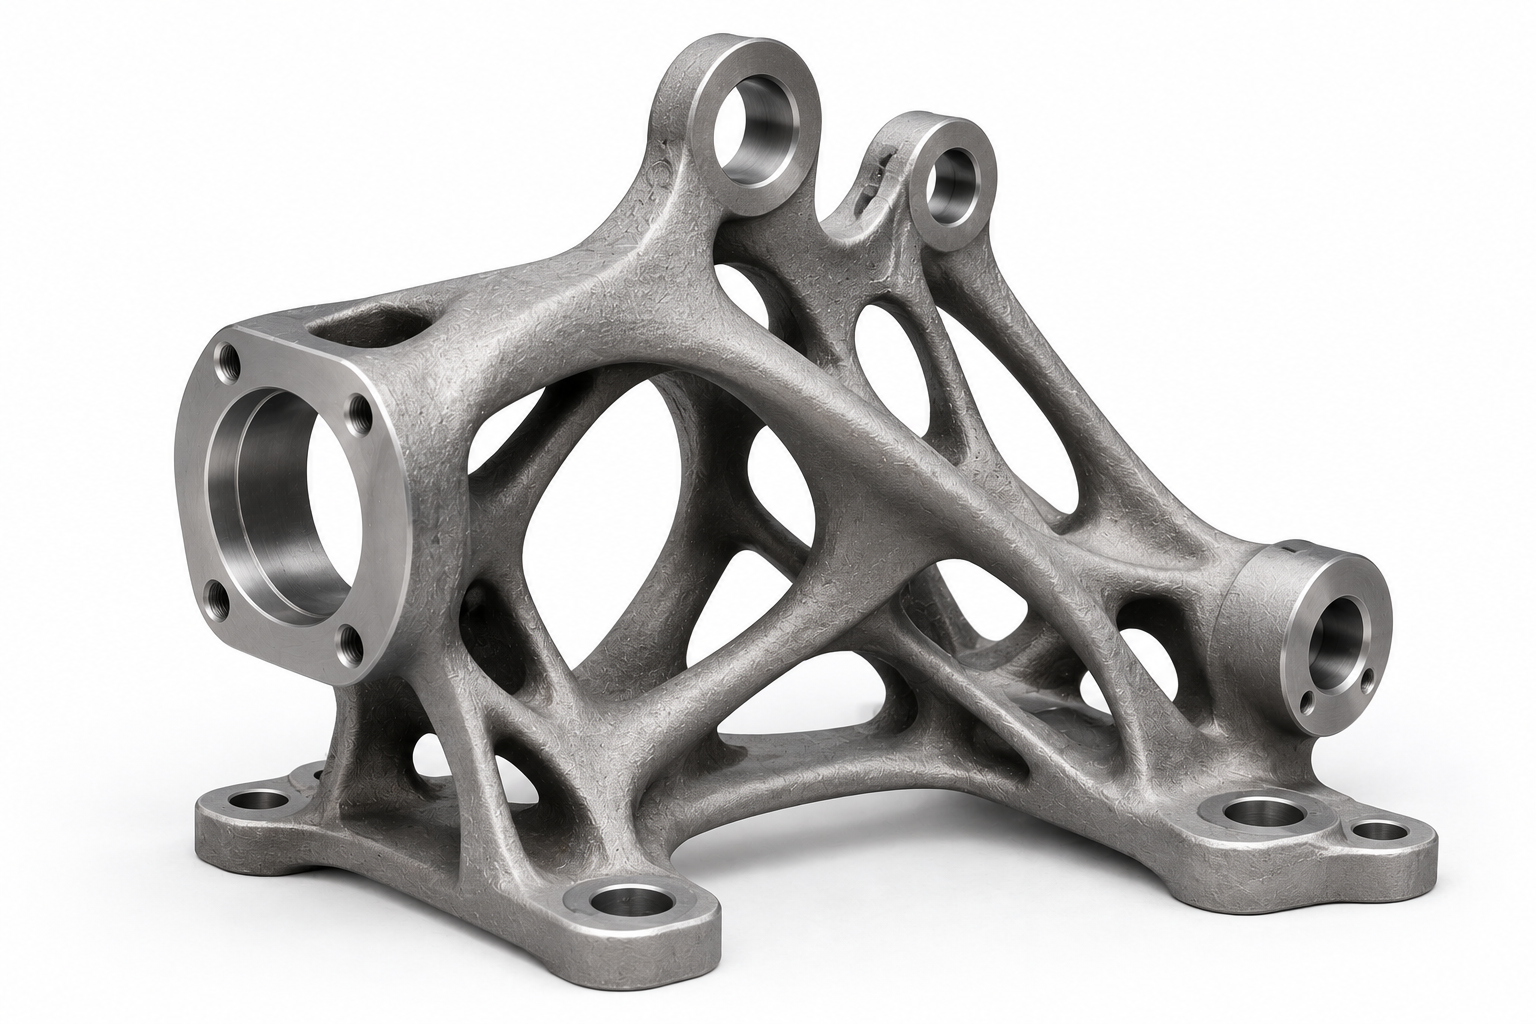
A metal 3D printed part is built from melted layers, and it inherits anisotropy, porosity, locked in residual stress, and a rough skin that decide where it cracks long before the alloy does
Developmech | Fatigue, Residual Stress & Materials Analysis
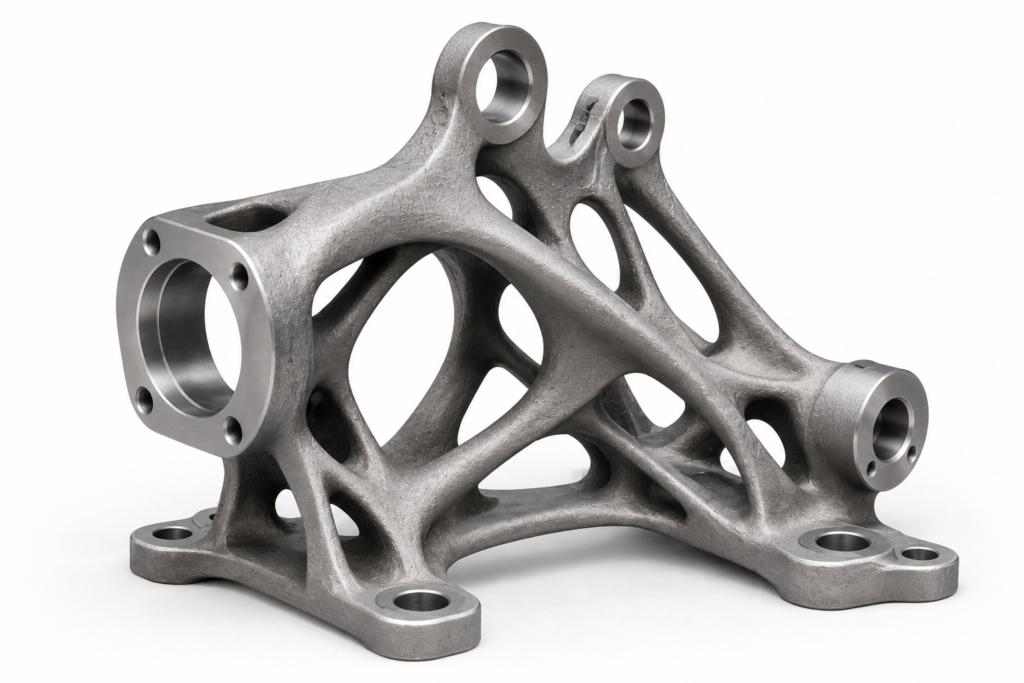
A 3D printed metal part looks like a solid piece of metal, and it is sold as one: same alloy, same strength, made without a mould or a billet. But it is not the same as a forged or machined part of the same alloy, and treating it as if it were is how printed parts fail. A printed part is built by melting metal powder one thin layer at a time, thousands of layers fused together, and everything about how it behaves comes from that process, not the alloy on the certificate.
Built that way, the part is really a stack of tiny welds, and it carries all the baggage of welding, multiplied. It is stronger along the build than across the layers, riddled with microscopic pores, locked full of residual stress from thousands of rapid heating and cooling cycles, and wrapped in a rough forest of notches. None of that shows up in a tensile test of a machined sample, and all of it decides where a real part cracks.
Here are the six ways a printed metal part fails, and why every one comes from the process, not the alloy.
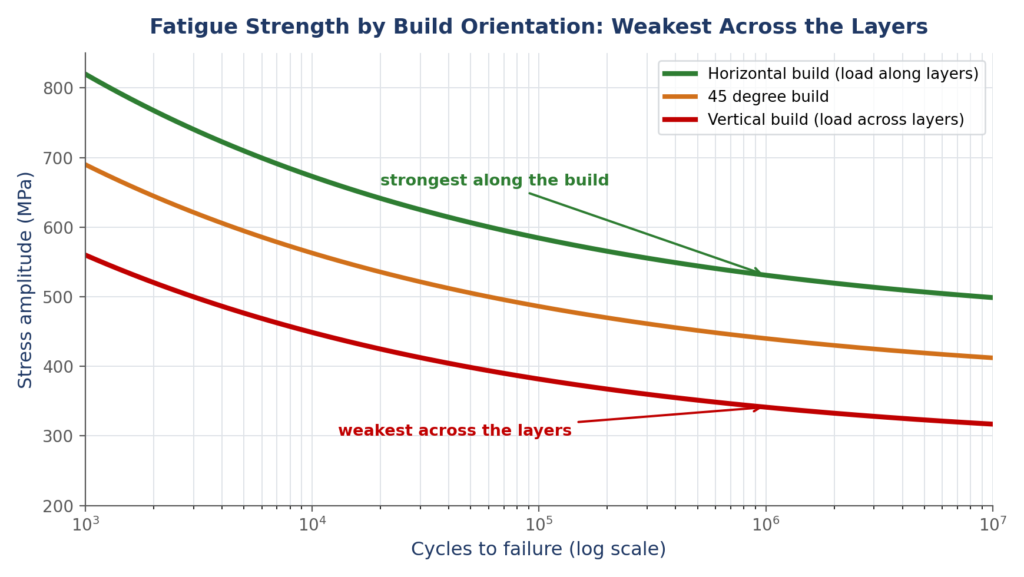
A printed part is a stack of fused layers, so it is strongest along the build direction and weakest across the layer boundaries. Its fatigue strength can vary sharply with how it was oriented on the plate.
A printed part does not have the same strength in every direction, because it is not one solid piece, it is thousands of melted layers stacked and fused. Along the build the load runs through the layers, but across it the load must cross every layer boundary, where the fusion is weakest and defects collect. The result is a part markedly weaker, and far weaker in fatigue, in one direction than another, depending only on how it was oriented on the plate. A geometry strong when the load runs one way is a crack waiting to happen when the same load runs across the layers, and nothing on the certificate warns you.
The cost. A part strong on the test bar and weak in service because the load runs across the layers, with a fatigue strength a fraction of what the same alloy gives in the strong direction.
The fix. Design and build for the load direction. Orient the part so the highest and most cyclic stresses run along the build, not across the layers, treat the printed material as directional and test it that way, and check the fatigue in the real build orientation, not a handbook wrought value.
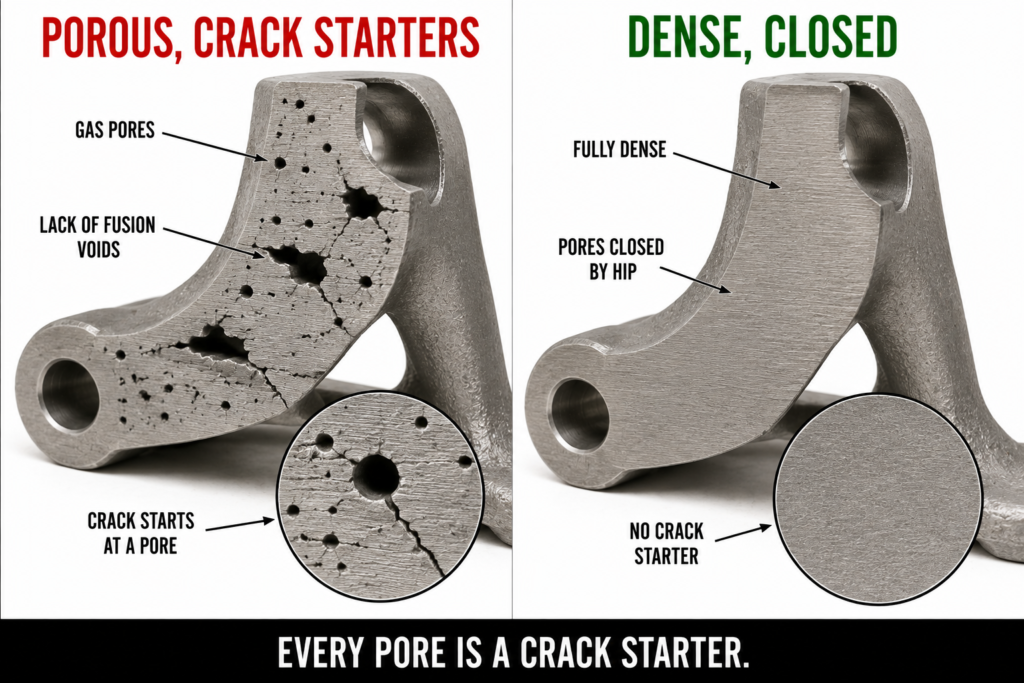
Trapped gas and lack of fusion leave pores through a printed part. Each one is an internal notch, and in fatigue the part fails from the largest pore in the most stressed place.
A printed part is almost never fully dense. Gas dissolved in the melt gets trapped as round pores, and wherever the energy was too low to melt the powder fully the layers do not fuse, leaving flat, jagged lack of fusion voids. Every one is an internal stress raiser, a notch buried in the metal, and while they barely change the tensile strength, they are ruinous in fatigue, because a crack starts at the largest pore in the most highly stressed region and grows from there. A printed part does not fail on average, it fails at its worst defect, and that defect was built in.
The cost. Fatigue cracks starting at internal pores and lack of fusion voids, a part failing far below the strength of solid metal, and a life set by the largest hidden defect, not the design stress.
The fix. Print dense, and close what remains. Tune the process so the metal fuses fully and the porosity is low, hot isostatic press to close internal pores where fatigue matters, inspect for defects with the resolution the duty needs, and base the fatigue life on the real defect population, not solid metal.
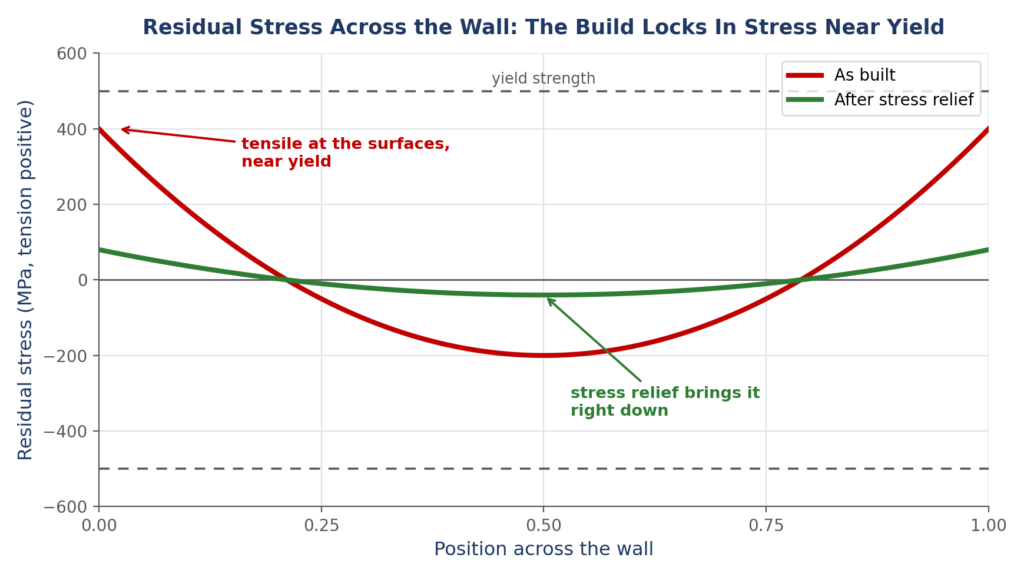
Each layer melts and shrinks onto the cold layers below, locking in residual stress that can approach yield. It distorts the part, cracks it on the plate, or springs it when it is cut free.
Every layer of a printed part is melted and then shrinks as it cools onto the cooler metal beneath it, and that shrinkage, repeated thousands of times, builds up enormous residual stress inside the part. The stresses can approach the yield strength of the metal, and they do real damage: they warp the part off its shape, crack it during the build, and spring it out of tolerance the moment it is cut from the plate and the locked in stress is released. A part that looks perfect on the plate can distort or crack the instant it is freed, all from stress that was never applied by any load, only by the way it was made.
The cost. Warped, out of tolerance parts, cracks that appear during the build or when the part is removed from the plate, and a shape that moves the moment the residual stress is released.
The fix. Manage the residual stress. Stress relieve the part before it is cut from the plate, choose an orientation and a support and scan strategy that lower the built in stress, model the residual stress to predict distortion, and treat stress relief as a required step, not an option.
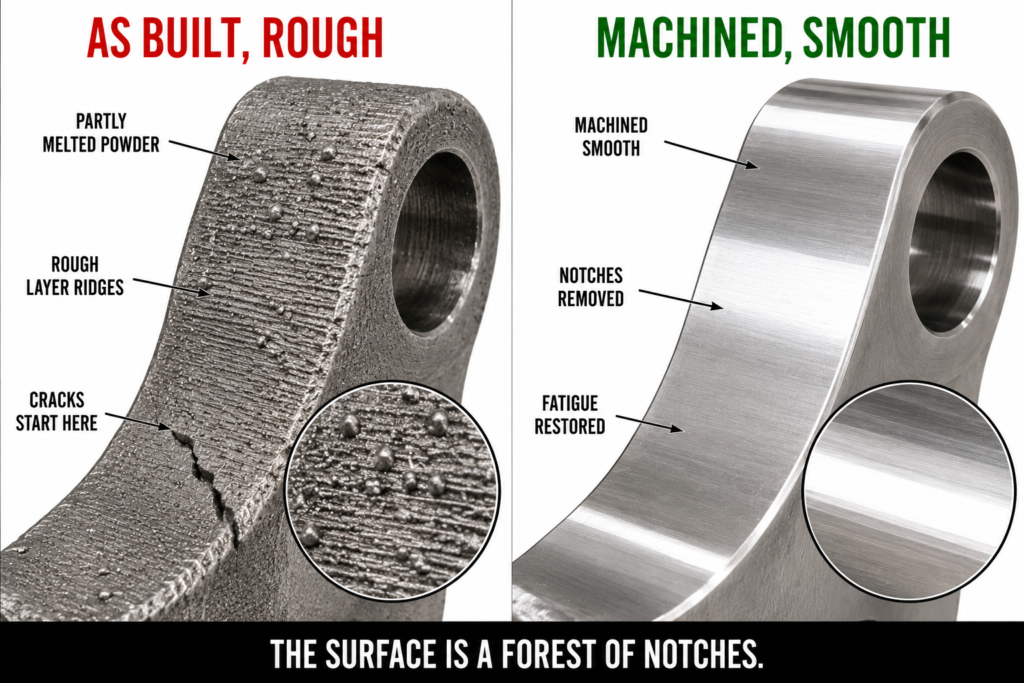
An as built printed surface is rough, with partly melted powder stuck to it. Every bump and valley is a notch, and fatigue cracks start at that surface unless it is machined away.
The surface of an as built printed part is rough, far rougher than a machined one, covered in partly melted powder and the ridges of the layers. In fatigue, surface finish is everything, because fatigue cracks almost always start at the surface, and a rough surface is a dense field of tiny notches each concentrating stress. An as built surface can cut the fatigue strength to a fraction of the same part machined smooth, worst on the down facing and overhanging surfaces where the roughness is greatest. The part can be sound inside and still fail from its own skin.
The cost. Fatigue cracks starting at a rough as built surface, a fatigue strength far below the machined value, and the worst life on the down facing surfaces that are hardest to finish.
The fix. Finish the surfaces that matter. Machine or polish the highly stressed, fatigue critical surfaces, design so they can be reached and finished, orient the part to keep critical faces off the roughest down facing angles, and base the fatigue life on the real surface, not a smooth one.
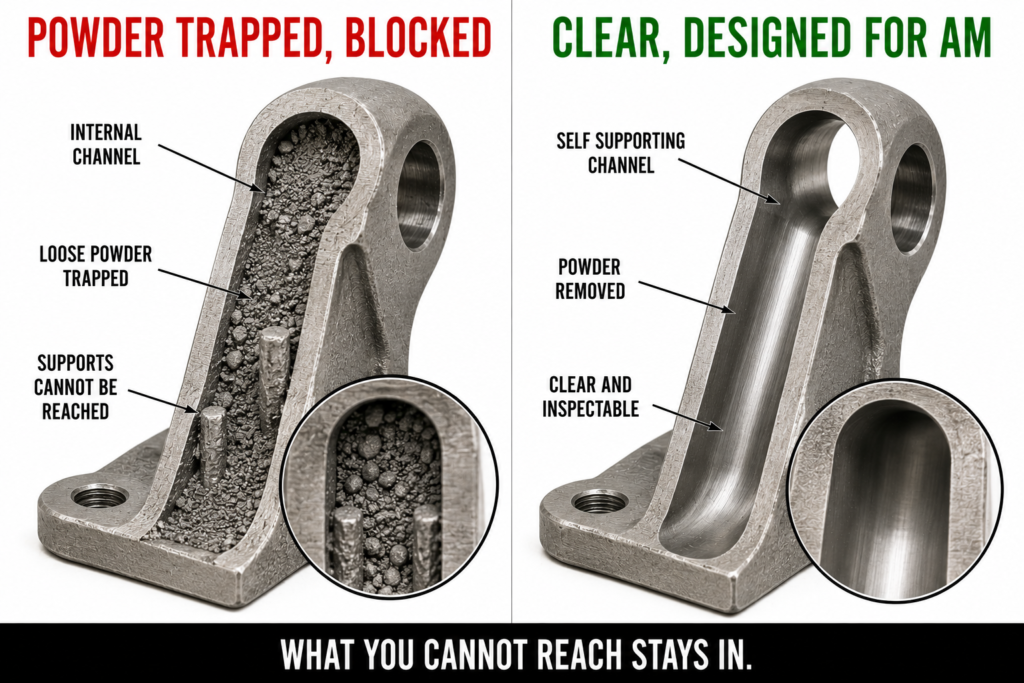
Printing allows internal channels and shapes, but the loose powder and the supports inside them have to come out. What you cannot reach stays in, and becomes a defect or a blockage.
The freedom to print complex internal shapes comes with a catch, everything inside has to be cleaned out. Internal channels fill with loose, unmelted powder, overhanging features need supports that have to be broken off, and if a channel cannot be reached, the powder and supports stay in. Trapped powder can break loose later and block a passage or contaminate a system, unremoved supports leave rough stumps and stress raisers, and both live where they are hardest to inspect. A printed part is only as good as the parts you can finish and verify, and internal features hide the ones you cannot.
The cost. Loose trapped powder that blocks channels or contaminates the system, support stumps left as stress raisers in places you cannot reach, and internal features that cannot be cleaned or inspected.
The fix. Design so it can be cleaned and inspected. Provide powder removal and inspection access to every internal feature, use self supporting angles so internal supports are not needed, avoid geometries that trap powder, and verify the internal passages are clear, not just the outside.
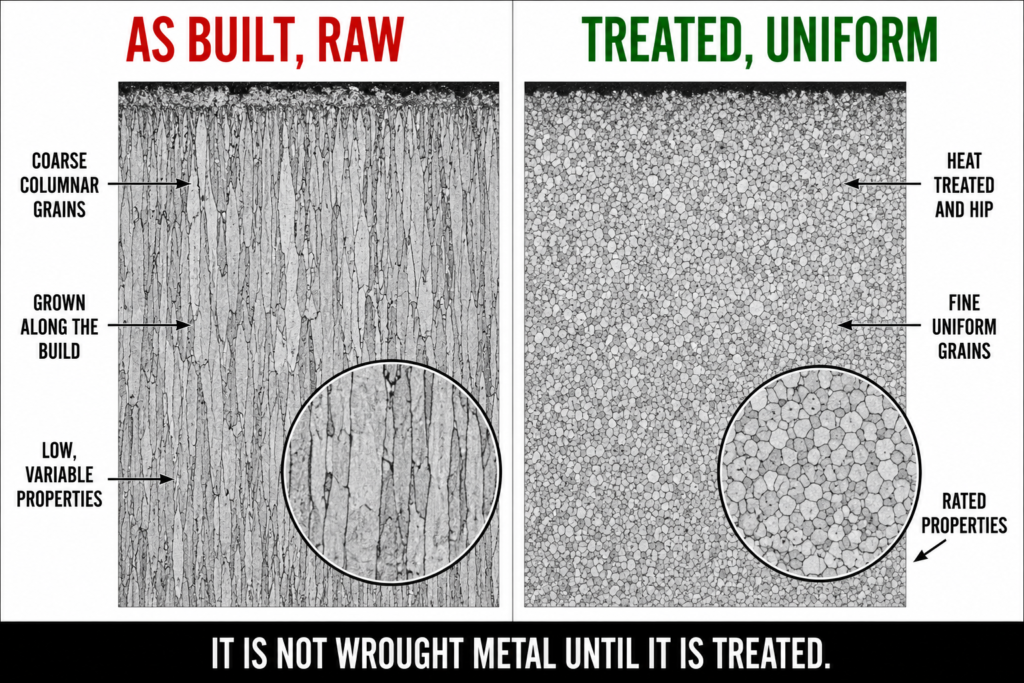
The rapid melting and cooling gives a printed part a coarse, columnar, non uniform microstructure. It reaches its rated properties only after the right heat treatment and hot isostatic pressing.
The metal in an as built printed part is not in the condition the alloy is famous for. The extreme heating and cooling rates leave a microstructure that is often coarse and columnar, grown along the build direction, unlike the fine, uniform structure of a forged version of the same alloy. In that state the properties are lower, more variable, and more directional than the datasheet, and they reach the rated values only after the correct heat treatment, and for demanding parts a hot isostatic press cycle that closes pores and homogenizes the structure. Skip the treatment and you have the shape of the part but not the metal it was supposed to be.
The cost. Low, variable, directional properties from an untreated as built microstructure, a part with the geometry of the alloy but not its rated strength or toughness, and scatter that makes it hard to trust.
The fix. Treat it to reach the metal you specified. Apply the heat treatment the alloy and duty require, hot isostatic press where fatigue and toughness matter, verify the microstructure and properties on witness samples built with the part, and specify the material in its treated condition, not as built.
A 3D printed metal part is not a solid billet made a new way, it is a stack of thousands of tiny welds, and it fails the way that stack fails, not the way the alloy would. It is weak across its layers, riddled with pores, locked full of residual stress, wrapped in a rough skin, packed with powder where you cannot reach, and left in a raw microstructure until it is treated. These are six different failures, anisotropy, porosity, residual stress, a rough surface, trapped powder, and a raw microstructure, and every one comes from the process, not the alloy on the certificate. Design the part for how it is actually built, orient it, print it dense, relieve its stress, finish its surfaces, clean its passages, and treat its microstructure, and it can be as good as forged. Treat it as if the printer already did all of that, and it cracks the other way.
At Developmech, we do the engineering behind additive metal parts: build orientation and anisotropic properties, porosity and defect based fatigue, residual stress and distortion, surface finish and fatigue, and the heat treatment, hot isostatic pressing, and inspection that turn a print into a load bearing part. If you put printed metal parts under real loads, we are glad to take a look.
